The ability to send file attachments (such as uploaded files and entry documents) through Microsoft Power Automate is only available to organizations on our Pro, Team, and Enterprise plans.
When sending the Entry Document (the PDF generated by the form) you will need to add a couple of steps to the Flow so the name of the document contains the file type and can be accessed in the other database. (This will require the HTTP action, which is now a premium option in Microsoft Power Automate.)
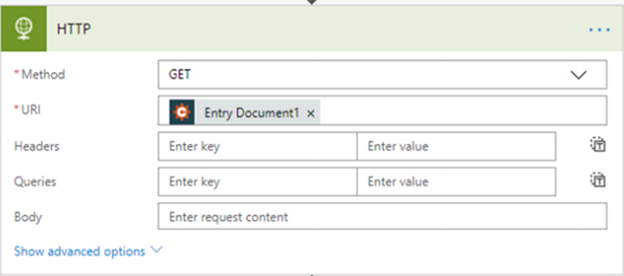
1. Search "HTTP" as the first action, after the Trigger of when an entry is created or updated. Choose "GET" as the Method.
2. Use the lightning bolt (dynamic content icon) in the URL box and choose the Entry Document you'd like to send.
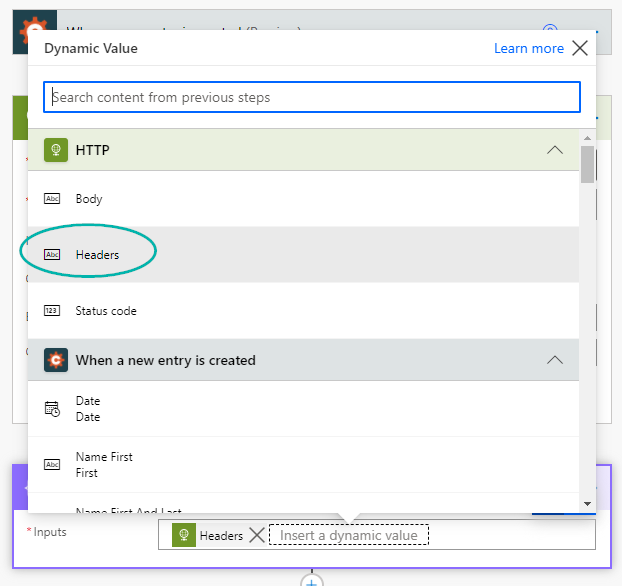
3. Next, add a step using the "Data Operation - Compose" action. Set the input as "Headers" from the HTTP action in the previous step, using the dynamic content menu.
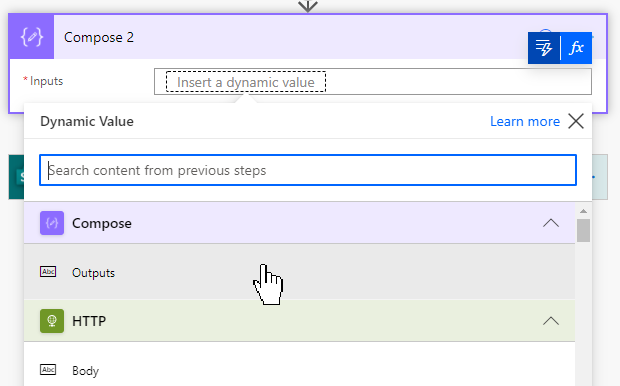
4. Then, add another step using the "Data Operation - Compose" action. This will automatically be named Compose 2. For the input on the second Compose action, choose the dynamic content "Outputs" that comes from the previous Compose step.
5. Then, after the Outputs dynamic content token, add the following:
[Content-Disposition]
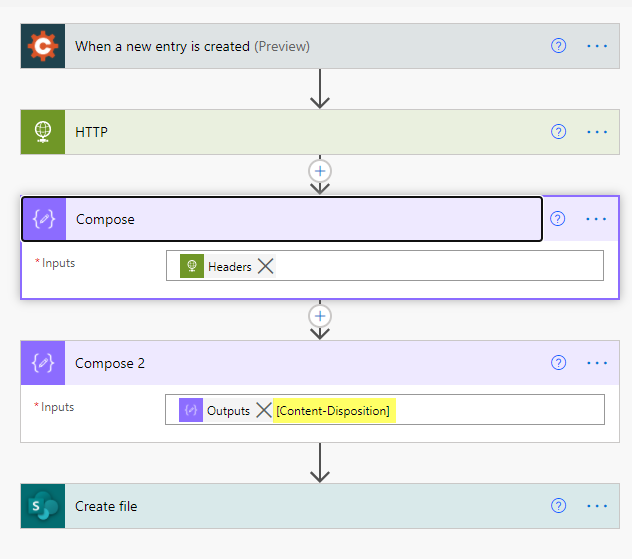
6. Next, choose which database you'll be sending the file to, and choose a corresponding action for that database. In this example, we are sending the file to SharePoint, using the "Create file" action.
7. The File Name will need to use the Function ("Fx") icon, next to the dynamic content option, to create a function. The function that will need to be used is:
split(outputs('Compose_2'),'"')[1]
It will look like this within the Flow:
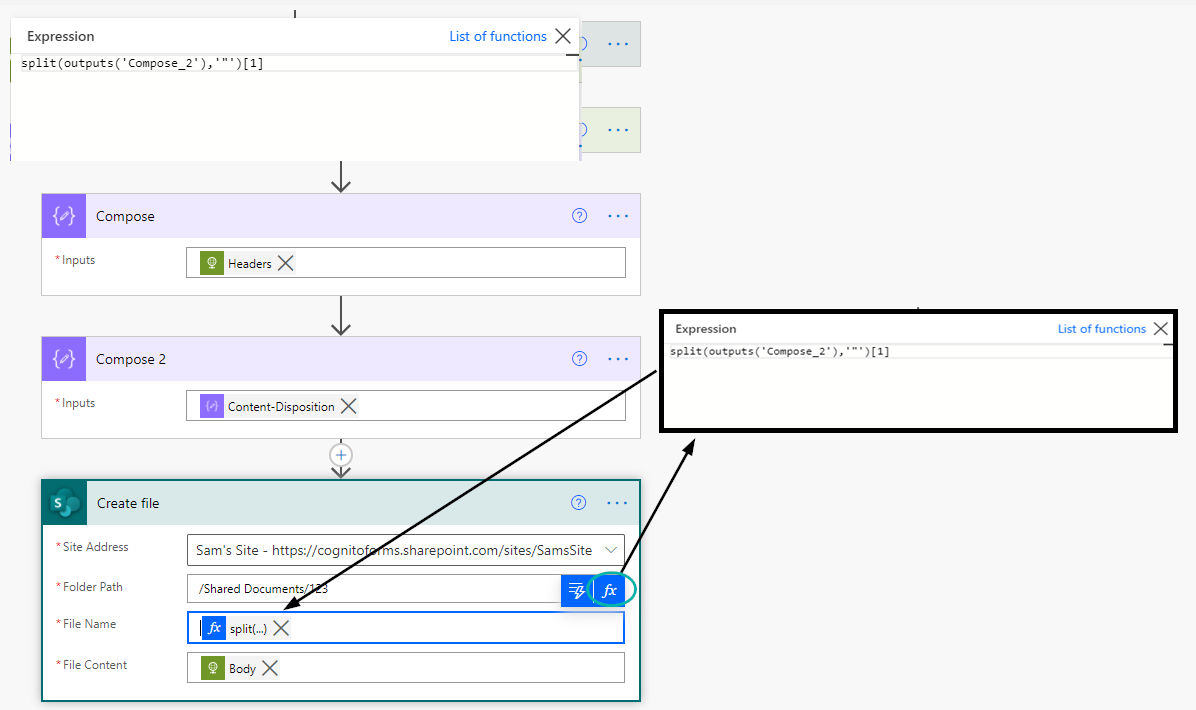
8. Finally, choose "Body" from the HTTP dynamic content options for the File Content.
Save your Flow, and then submit a test entry using your form to make sure everything is sent correctly.
If you run into any issues with setting this up, please Contact Us, and we'll be happy to assist with setting this up!
0 Comments